Hoverhandle Assembly Procedure
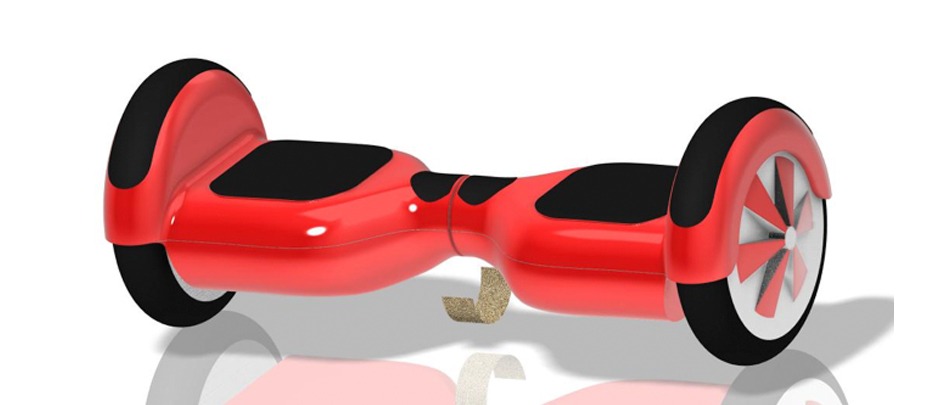
STEP #1
With hoverboard on a smooth, level surface at about waist height, cut a piece of masking tape 4” long by 1” - 1.5” wide
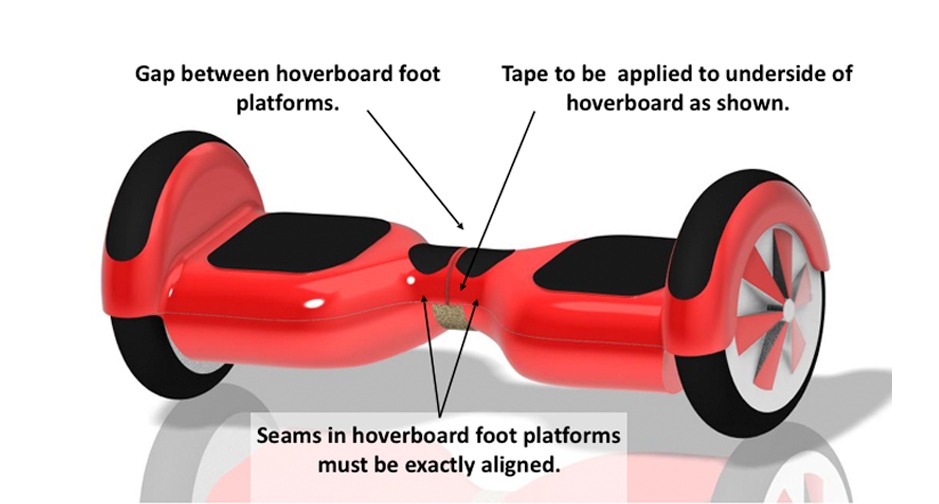
STEP #2
With both hoverboard foot platforms aligned, secure them with the tape, straddling the gap, to prevent them from rotating with respect to each other. A helper may be employed to align and hold the foot platforms while you apply the masking tape, which will only be used temporarily.
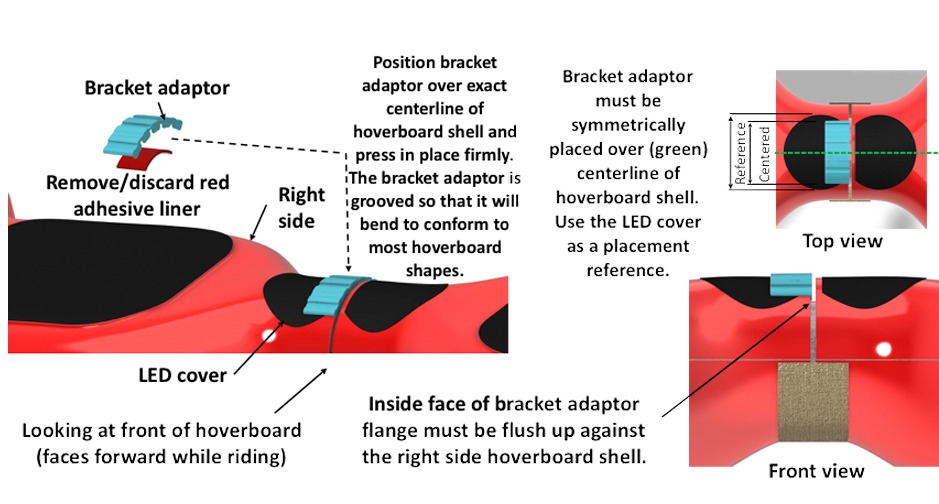
STEP #3
Remove the red film from the bracket adaptor adhesive (use tweezers if it’s difficult to lift liner) and place on the right side hoverboard foot platform so that the flange goes into the gap between the left and right foot platforms.
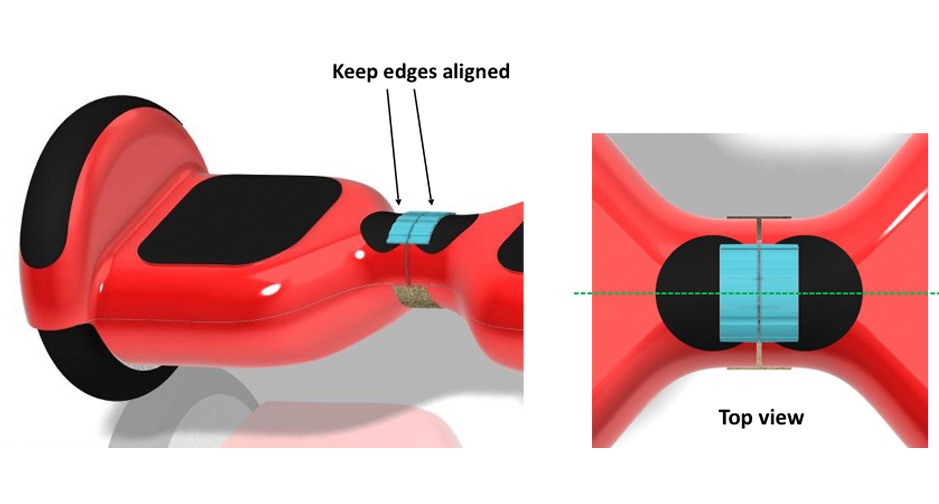
STEP #4
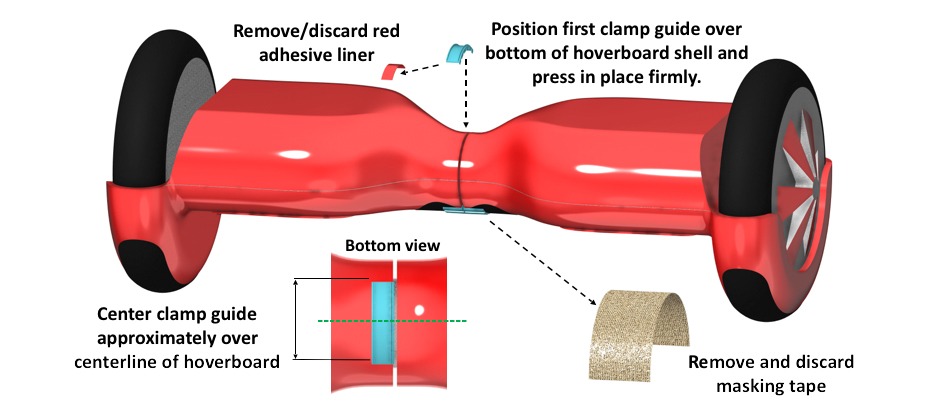
Turn hoverboard over so that the bottom of the shell is facing up. Remove the masking tape. Remove the red adhesive liner from one of the clamp guides and install the clamp guide so that the flange is inside of the gap between the left and right foot platforms.
STEP #5
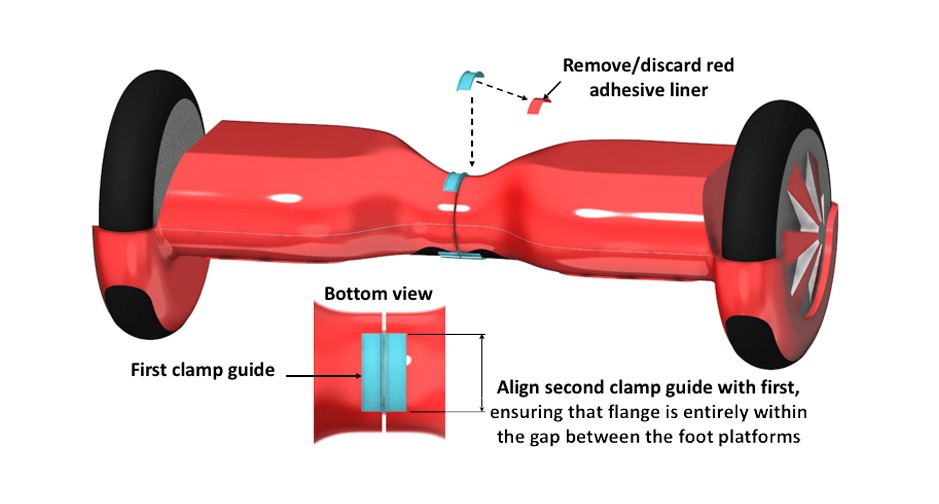
Remove red liner on second clamp guide and install the clamp guide so that the flange is inside of the gap between the left and right foot platforms, and aligned with the first clamp guide.
STEP #6
Remove red liner on second clamp guide and install the clamp guide so that the flange is inside of the gap between the left and right foot platforms, and aligned with the first clamp guide.
STEP #7
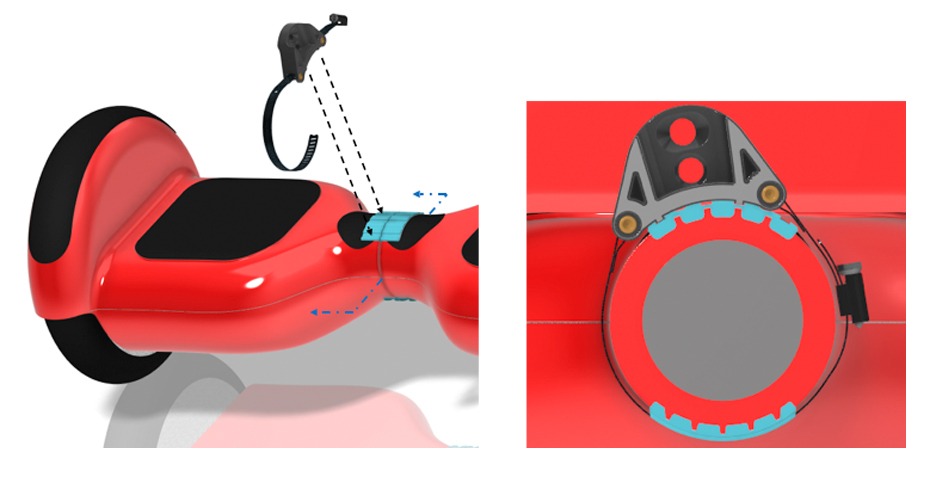
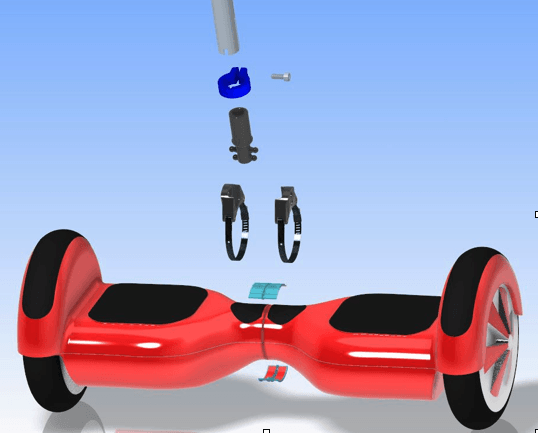
Attach the right side bracket assembly to the bracket adaptor by positioning the two index ridges on the bracket into slots 1 and 3 on the bracket adaptor, then feed the slotted end of the band clamp around the bottom of the hoverboard and into the clamp housing.
STEP #8
Looks like we are missing three of four steps need images and instructions like others....


